Updating a Booth Display
Rebuilding a Craft Booth from the Displays Up
Starting a New Chapter
Up until this year I had only done one or two craft shows a year. I have dreamed of building my hobby into a business for a long time. I knew that in order to do that I had to start branching out to where I did year-round shows. The problem was, this was totally out of my comfort zone. I knew what the market was for fall and winter crafts. I had a base of inventory that I build on from year to year for the year-end shows. But I had absolutely no idea what inventory to make for spring and summer shows. I couldn’t wait to see what would be popular in department stores, because I had to start on inventory right after Christmas. All that I could do was wing it based on what research I could find on Google and Pinterest.
Jumping in Headfirst
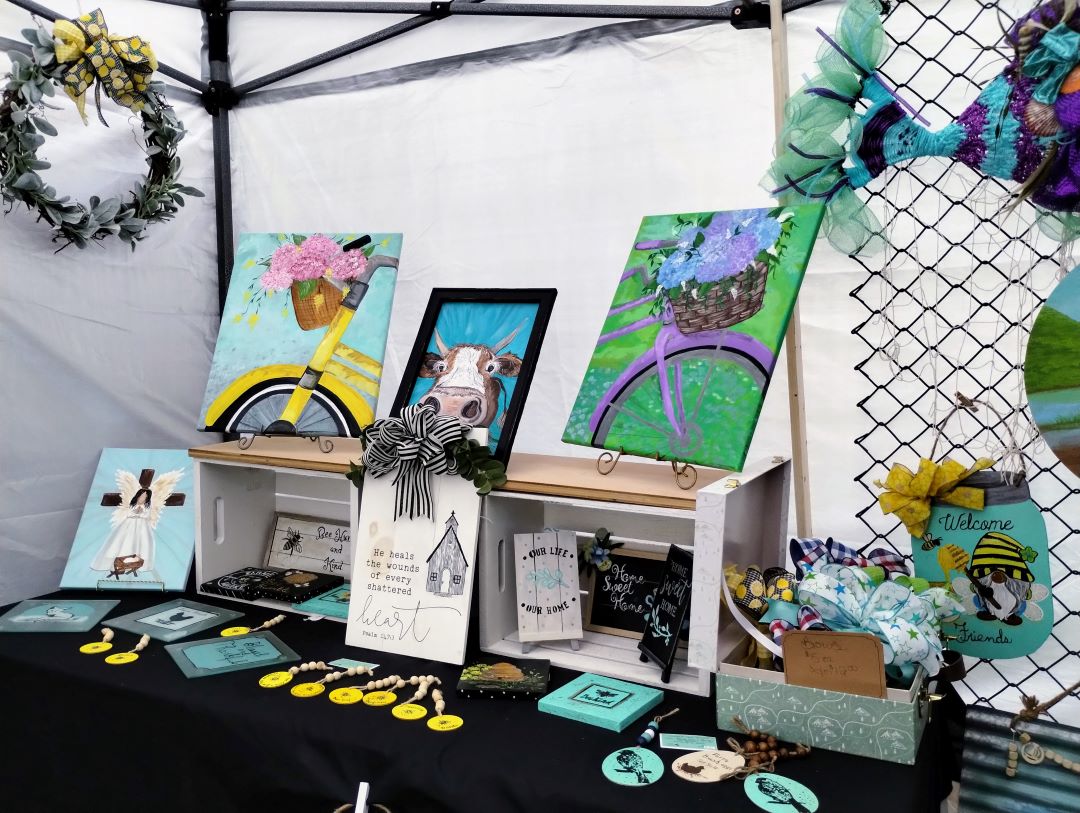
I created a board on Pinterest and labeled it “Spring and Summer Crafts”. I wanted examples of things that were popular in the last year or so. Over time a pattern emerged. The most prevalent decor trends seemed to revolve around Bees, Lemons, Garden Gnomes, Water Melons, and Florals. I don’t like making replicas of other people’s creations, I want my decor to be unique. I had my subject matter planned, now it was time to start getting creative.
Spring & Summer Crafts on Pinterest
Buying Supplies
When it came to crafting supplies for spring and summer crafts, I had very little in storage that I could use. I was starting from scratch. I was able to buy small wooden hangers from Dollar Tree to use as a base for many of my projects. But I bought a lot of my supplies from both Joann’s and Hobby Lobby as well. Stocking up on the new supplies proved very expensive.
Mistakes That I Made
I will be frank here, I overspent! I was so nervous about not producing enough inventory that kept buying supplies for new projects (many of which I never even started work on). Finally, my daughter stepped in and told me that she thought I was overthinking it, and overproducing what would actually fit inside my 10 x 10-foot craft booth. She advised me to do a mock set-up of my booth in the garage before I made anything else. She was absolutely correct! I had let my nerves get the best of me.
Advice to Self
In order to keep from repeating the mistakes that I made this year and again next season, I am making “notes to self”. I thought that I would share my list here with you all as well.
- Don’t create expensive items for the booth. Limit the top price to $40.00.
- Create large items that look high-end, but that I can afford to sell under that $40.00 maximum. Examples: burlap hangers, Large wooden-shaped hangers, etc.
- Create lots of “littles” that range from $1.00- $10.00
- Pack a toolbox into the vehicle before anything else (I walked off and left my toolbox at home for the first time ever!).
- Use supplies that I have on hand before buying new supplies. I spent a fortune on supplies that were totally unnecessary for this show.
- Try and visit the show if possible, or at least google it and look for photos of booths set up there in recent years. If I had done this, it would have saved me a lot of unnecessary spending. I should have paid more attention to what I was spending. Have a budget for supplies and stick to it.
- Stick to local shows that do not require an overnight stay!!
The Show
For this show, the phrase “sink or swim” would have been a just heading! No joke, it poured rain on Friday night and into the morning on Saturday. The one area that I spent money on for this show that paid off was my investment in a new canopy. I found Vevor.com while searching for a canopy. Vevor’s canopy was affordable so I took a chance and ordered it. I was very impressed with the quality of the canopy frame from the start. But after seeing the condition of canopies near ours after a night and morning of heavy rain, I was not only impressed but very thankful that I had purchased this canopy. It saved my bacon!
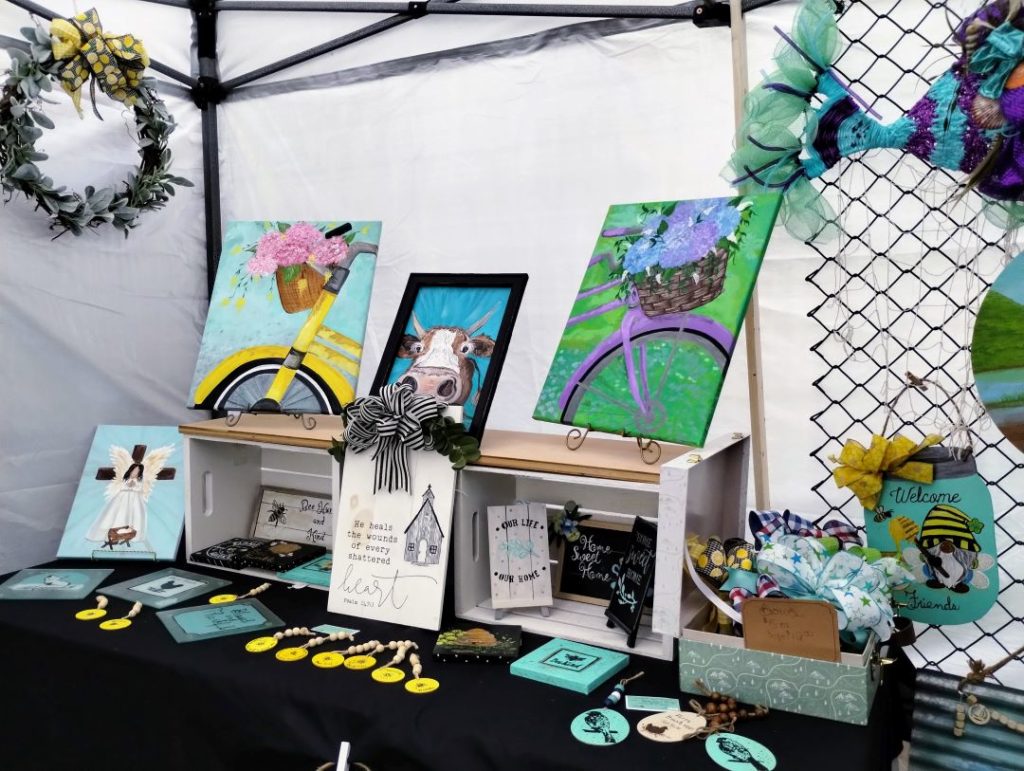

It stopped raining at about 11:00 in the morning. By the time it stopped, the showgrounds were a muddy mess. I was amazed that people started showing up. I didn’t leave the show with the profits that I had hoped for, but at least I broke even. Sadly many others didn’t far that well.
What Worked, and What Didn’t
What Worked:
1.) The plastic-coated chainlink fencing as a Grid-wall to hang wreaths and wooden wall hangings. Con: Even though it worked, it wasn’t aesthetically pleasing.
2.) Using 1″x2″ boards to make braces to place in the middle of the canopy frame along the walls that held the fencing. This supported the structure that was under strain from the weight of the fence and the decor it held. Con: I didn’t have the boards painted and this too kept my booth from being as attractive as it could have been.
3.) The new Vevor Canopy. It held up to the heavy rain without water pooling on the canopy.
What Didn’t Work Well:
1.) The shower curtain hooks I bought from Dollar Tree that I used to hang the wreaths: the hooks broke easily under heavy weight. Remedy: invest in better-quality hooks.
2.)Using cardboard boxes to transport the inventory to and from the show. My boxes got wet even though I had a trap spread out under them. Remedy: use plastic crates that are stackable if not in use.
3.) The way I set up the booth. I placed the grid walls on the side that limited people from seeing the contents of my booth as they approached. Remedy: pay attention to the flow that foot traffic will take, and set the booth up accordingly ( I knew better, and still made this mistake).
Was it Worth It?
To be honest, when I left the show, I decided that I wouldn’t do a Spring show that far away from home again. I was out the cost of the booth space, gas, and hotel fee. When you do outside shows, you are at the mercy of the weather. It’s a gamble at best as to whether it will be a good show or not. The rain hurt the turnout. I was lucky that I broke even. Many did not.
After talking to my daughter she made me see things in a more positive light. It could have been worse. I at least broke even. It was also my first spring show, and I was unsure of what to take in the way of inventory. Yes, some of my inventory seemed to go unnoticed, but much of it sold and got attention. I made mistakes that I shouldn’t have. It’s not like I am new to being a vendor. But, I intend to learn from those mistakes moving forward. Although, I am still undecided about whether I will invest in the Glendale Spring Show again. Maybe next year I will go enjoy the show as a customer and leave the booth space open for those more adapted to the frivolous nature of spring weather in Kentucky than I am.
Looking Forward
Being a vendor is always a risk. You never know what will be your “big seller” and what inventory will be ignored. You are at the mercy of the weather, whether it is an inside or outdoor show. It’s tiring work. You are never going to get rich being a vendor. So why do I keep doing it? I love it! I love interacting with people coming and going from my booth. People return year after year to buy my artwork. I love talking with young kids that are already artists. I love seeing them examine my work, and talking with them about ways that they can have a career as an artist that does pay. For me, it is a hobby. So as long as I break even, I will likely be at craft shows.
Craft Show Vendor: to be or not to be, that is the question that I am currently asking myself! It is always a risk when starting a new venture. And even though I have done shows for years, trying to expand is almost like starting over. The only thing I can say is this: if you love interacting with people and making beautiful things craft shows may be the perfect fit for you. I hope that this article has been a bit of a help to those considering becoming a vendor. Remember research is your friend. Keep your budget firmly in place when buying supplies and displays. And most of all, enjoy the adventure.
Thanks for stopping by. Drop in again real soon.
Vikki

