DIY Round-Wooden Door Hangers for Beginners
The possibilities for designing unique and personalized home décor are endless. One of my favorite decorative items to make is large wooden wall and door hangers. Door hangers make great gifts and are affordable to create.
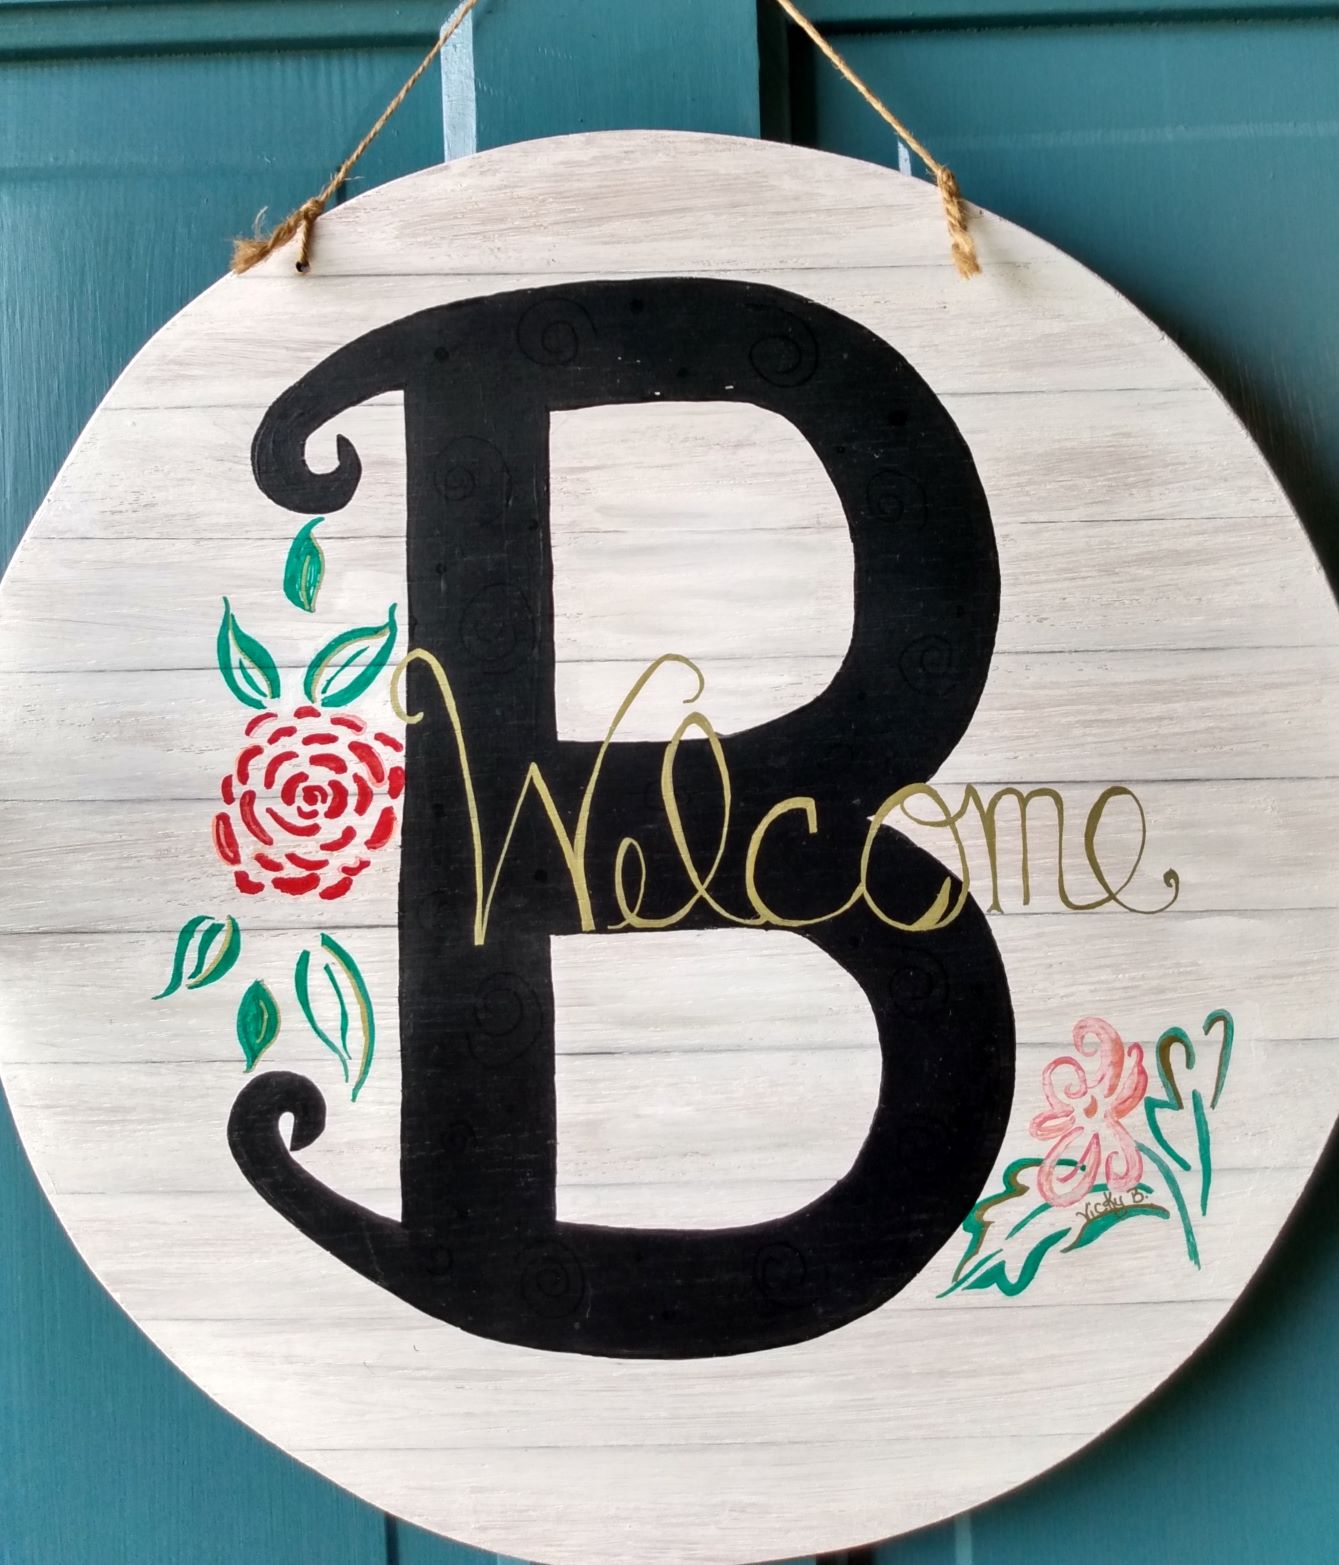
The monogram door hanger, featured in the header, is one of the first that I designed. I wanted a very simple design that was also welcoming to guests. I love it so much that after three years, it still graces our door at times.
These wooden hangers always sell well at my shows. I try to make each one unique, and some of them are made to be reversible. I have made them for babies’ rooms, Seasons, Holidays, and even weddings. They can be tailored to fit anyone’s style and decor tastes, making them perfect for gift giving.
After you have read through the institutions, if you have any questions, feel free to leave a comment and I will do my best to guide you through.
Supplies
- large wooden circle
- fine-grit sandpaper
- acrylic paint
- liner (paintbrush)
- paintbrushes
- clear acrylic spray sealer
- Floral wire
- wired ribbon
- 1-inch wide masking tape
- drill and bit
- twine
- glue gun
- glue sticks
The instructions that I am providing are for the wood hanger with three separate colored sections. I know it is a little early for Christmas décor, but you can use this same technique on any of your designs. I just happen to work during the summer to get ready for a couple of holiday craft shows at I do, and decided to use the one I was working on as my example piece (and yes, I do catch myself singing Jingle Bells as I work).
Preparing Your Wood Circle
To prepare your wood circle for painting there are a couple of things that you will need to do.
- Using fine-grit sandpaper, lightly sand your wood.

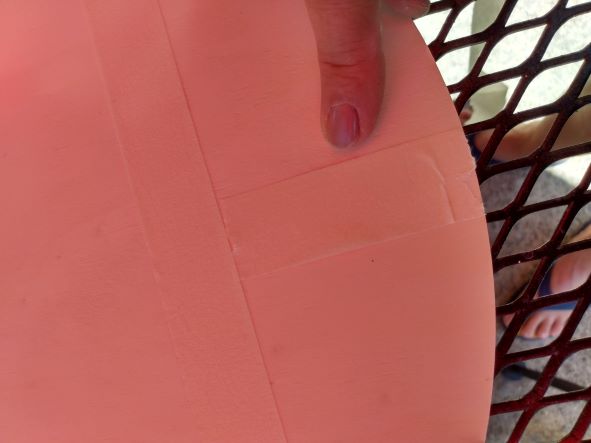
2. Next decide where you want your holes to be for your twine. Place a piece of masking tape across the diameter of the circle, making sure it is in the same direction as the wood grain.
Measure the same distance from the top on both sides. Now, measure the same distance from each side. Draw a dot to mark the place where you need to drill holes.
Note: My wooden circle is 14 inches round. I measured 1 inch down and 1 inch in from the side. You may need to adjust your spacing to suit the size of your wood.

3. Add tape across the back of your wood, pushing it down firmly over the front edge. This will help prevent splintering on the back of the wood as the drill bit punches through.
4. Drill your holes.
5. Use a lint-free cloth to remove any dust from drilling.
Blocking Off Sections to Paint
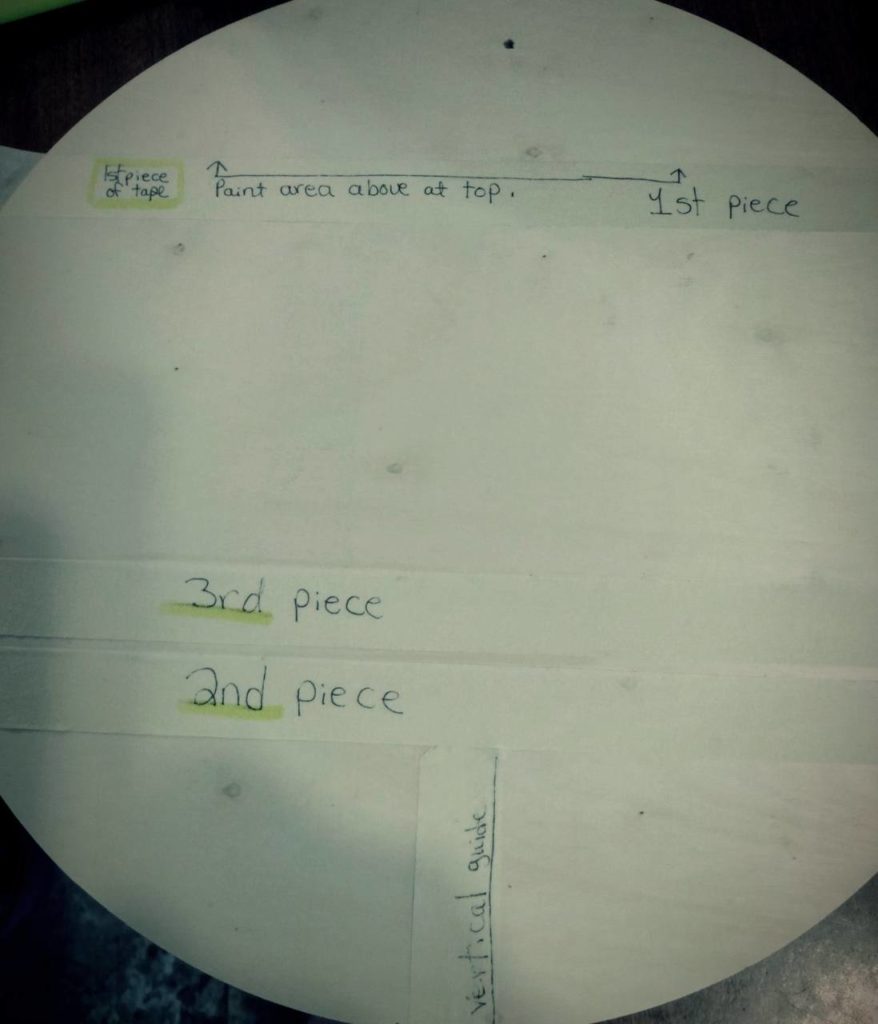
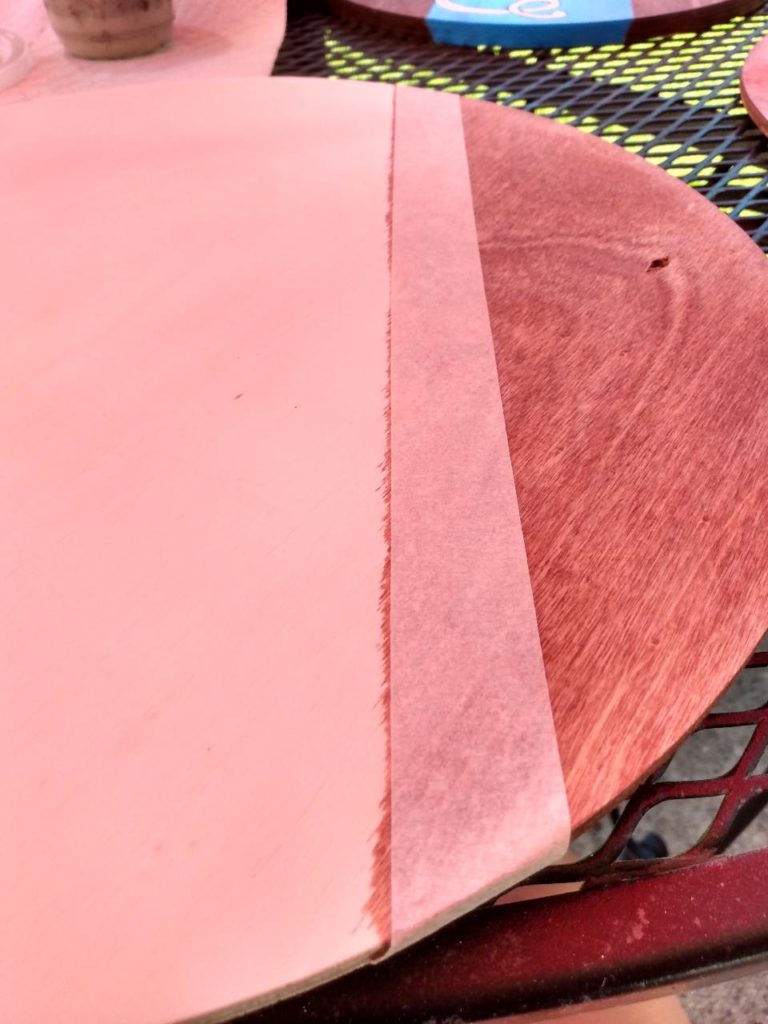
To block off a section to paint, you are again going to add a piece of tape across your wooden circle. Use the same method to measure down from the top on each side, making sure your tape is straight.
Once your masking tape is straight, add a second small piece of tape from the top edge of your wooden circle down to your tape (it will be in a vertical position). Then, move your small vertical section of tape to the bottom/center of your circle (This will act as your guide when placing your tape to mark your bottom section).
Playing Leap-Frog With The Tape
(Placing Your Paint Guides)
Starting under the first large piece of tape, that marks your top space to be painted, add a second and third piece of masking tape.

Now you are going to move the 2nd piece to be just below the 3rd piece (keep your 2nd piece of tape as close to the 3rd as you can without touching it).

You are going to repeat this step, now moving the 3rd piece to below the second. Continue until one of the pieces of tape has been moved into position directly above the vertical tape we used as a marker for our bottom painted area.
Painting Your Sections
Make sure that your tape is pressed firmly in place. Before you paint.
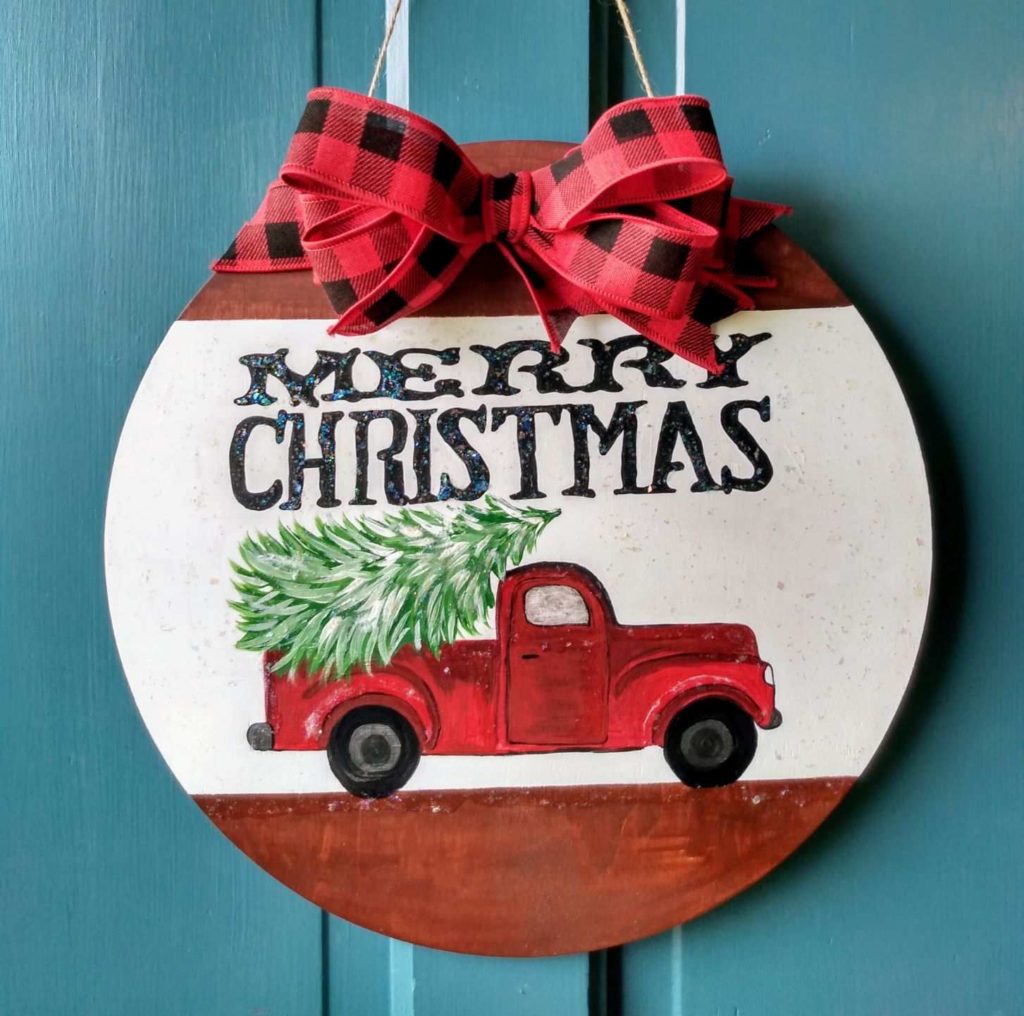
I used a stain on the top and bottom sections of my wooden hanger and used paint in the middle. I thought that the stain may bleed into the area below. For that reason, I stained the top and bottom sections first.
After the stain was dry, I went back and moved my tape up a bit to where it rested on the stained area giving me a clean line to paint in my second color. I then painted the middle section.
Note: The sooner you can remove the tape after your painting the sections are complete the better.
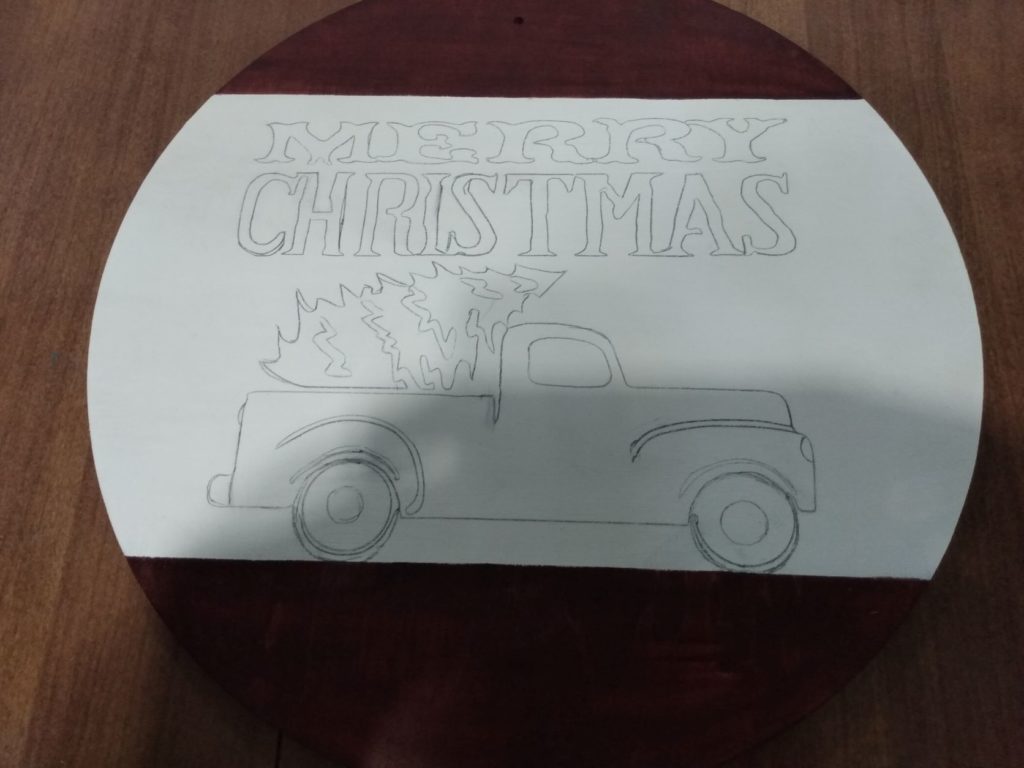
Drawing In Your Design
Once all the sections are painted and dried, you are ready to draw in your design.
At this point, you may also choose to use vinyl appliques instead of painting on a design.
I used a graphic and laid it over a piece of carbon paper to transfer my design. I often free-hand the designs, but I wanted to test and make sure the carbon paper would work before recommending it to you.
Finishing Your Master Piece
All that is left to do at this point is to paint your design and add any finishing touches. For the piece that I did as my model, I added glitter paint to the background and lettering. Then I sealed it with a spray sealer. For my finishing touch, I tied and added a bow, hot. The bow is hot glued in place.
Resources:
Note: None of the stores mentioned are affiliates of this site.
I purchased my 14-inch wooden circles from Michaels. I have also used the 12-inch wood circles from Lows. The price of the wood will depend on the size and thickness of the piece.
You can find them online, but be careful that they are at least 1/4 inch thick. If they are thinner than that they will bow or break easily.
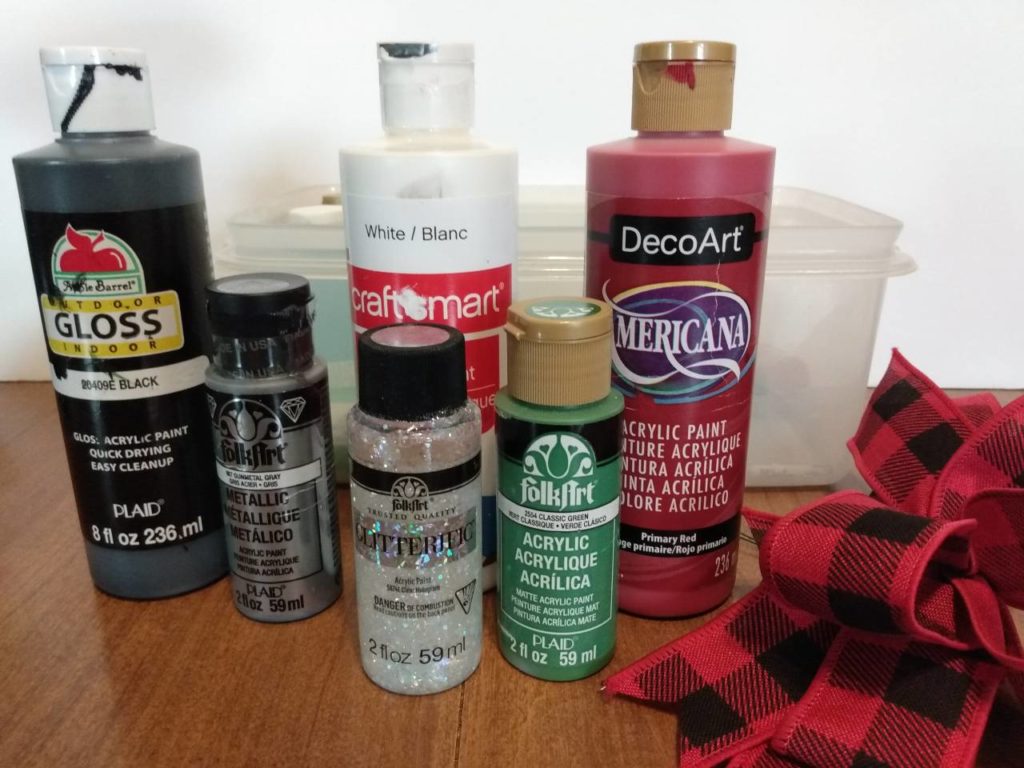
I used Rust-oleum wood stain in Cognac for my top and bottom sections. Below is a photo of the other products that I used (I had all the needed supplies on hand).
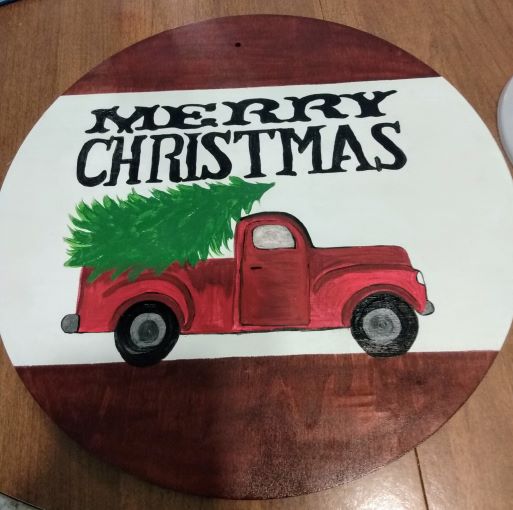
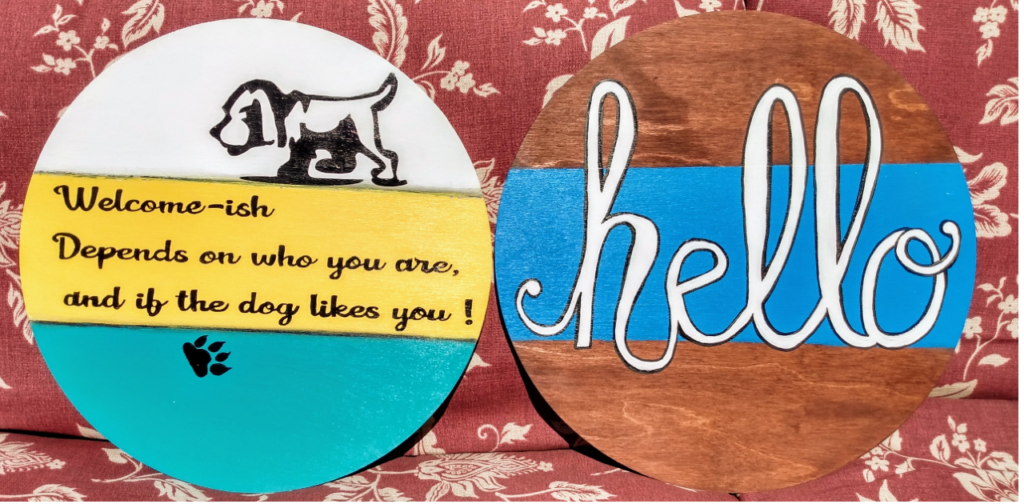
Other Wooden Hangers that I Am Working On:
As you can well imagine, getting ready for craft shows takes a lot of work and self-discipline. By October I have to have at least thirty of these completed. I thought that I would show you a couple of the ones that I am working on now. Life is very exciting and busy just now. I am very behind schedule this year due to learning to manage this blog. We are also about to become first-time grandparents.
When I am stressed, painting and creating takes me to a peaceful place. I hope that you enjoy this craft as much as I did.
Start your project.
If you decide to create a wooden door hanger, I’d love to see your finished piece. Let us know if you are making these as a gift, for yourself If you have enjoyed this post, you are welcome to subscribe or share this post.
You all drop back by again soon,
Happy Crafting,
Vikki