Easy and Affordable Hand-painted Mugs for Gift Giving
One-of-a-kind hand-made gifts do not have to be complicated or expensive. Hand-painted mugs are perfect gifts to create for teachers, Father’s Day, as thank you gifts for your wedding party, or for any occasion you can think of. The mug in the photo is a Father’s Day gift. I am going to show you how I create your own hand-painted mugs that are durable and top-rack dishwasher safe. The trick is in first preparing the mug, and then using the correct type of paint. I also limit the paint to three to four colors per design.
Skill Level: Beginner to Skilled
Beginners: choose a simple pattern. Pretty doesn’t equal complicated.
Cost: Under $10 ( it depends on what supplies you have on hand, and the number of paints you choose to use).
I had most of the needed supplies already. You can buy the paint, alcohol, and mug at Wal-Mart. My brushes are from Jerry’s Artarama, but the ones from Walmart will work.
Make a Mug That Will Make Their Mornings
When I worked at a public school every year I got mugs. Most of them said something along the lines of “World’s Greatest Teacher”, or had apples on them. While I loved and appreciated the gesture. I soon had so many mugs that were not really my style that I couldn’t keep them all. I’d use them for a bit, then pass them on.
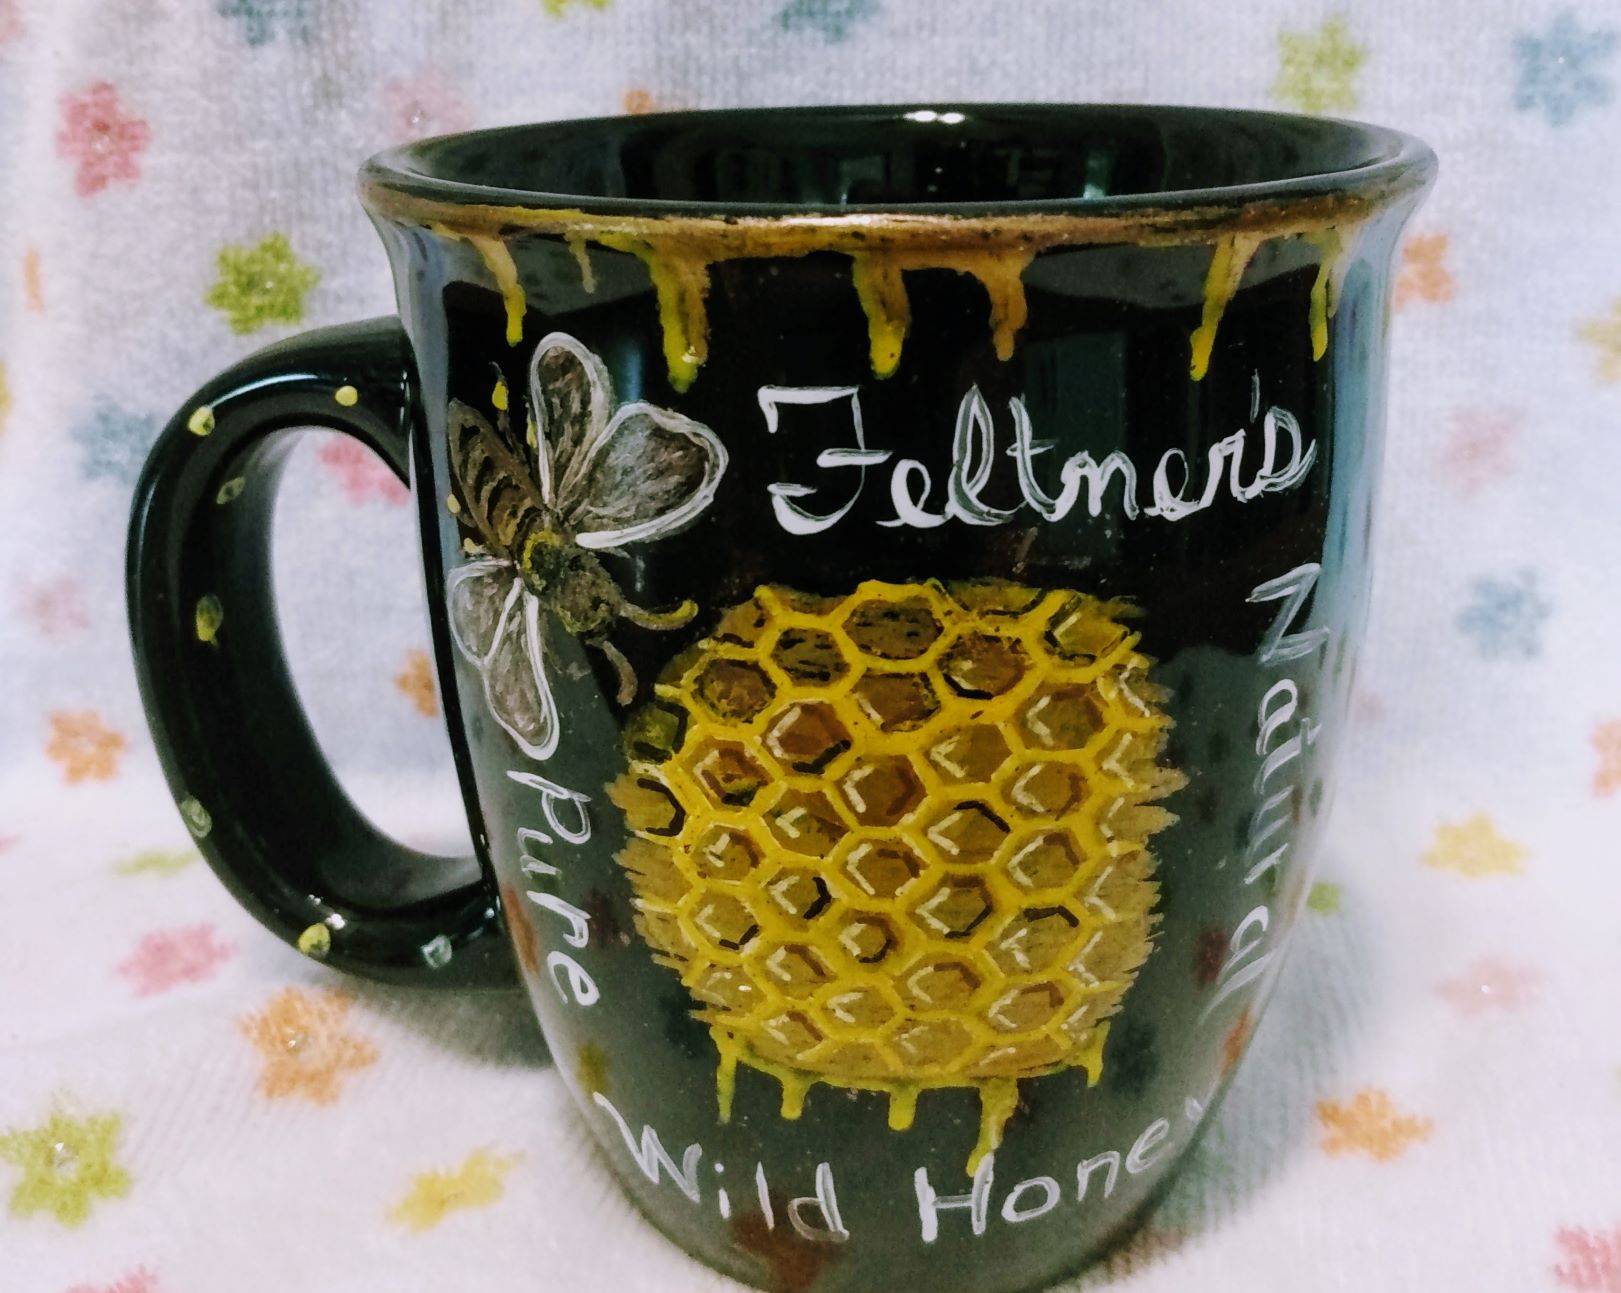
The mugs that I kept long-term were the ones that showed that the person had put thought into the gift. I love butterflies and honeybees. One year a parent graced me with a beautiful mug with yellow trim around the top that had flowers, bees, and butterflies on it. Her note read, “because you love bees and because you have been so sweet to my child and me”. I loved that mug and used it until the handle broke off of it.
If you possibly can, personalize the mug in a way that will be meaningful to the person you are gifting.
Shopping For Paint
Not All Acrylic Paints are Created Equal. If you look carefully at the labels of acrylic paint you will see that some say “air dry”. They do not have any curing instructions. That type of paint will work well for artwork on canvas or wood, but it will not be durable on glass.
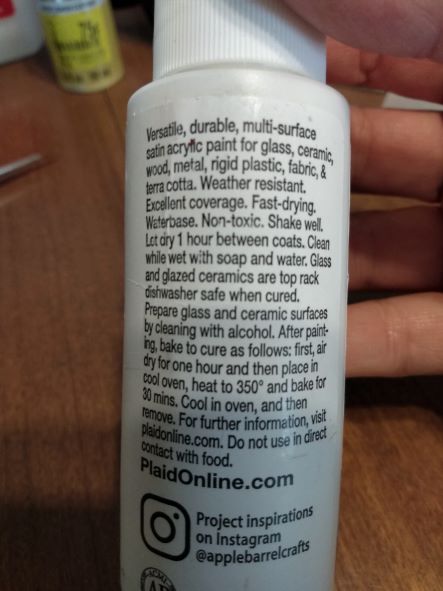
Read the labels carefully before you buy, the label needs to say:
- Non-toxic
- Multi-purpose
- Dish-washer safe
- Curing instructions for oven
Supplies:
- Coffee mug of choice
- Isopropyl alcohol
- Lint-free cloth
- Dish-washer safe Acrylic paint
- Paint brushes of choice
- Liner-style paint brush
- paint palette
- Small container of water (to wash brushes)
- Old newspaper
- Oven
Let’s Get Started
The first thing that you will need to do is to wash your mug and hand dry with a lint-free cloth. Then use a lint-free cloth to wipe down the mug with isopropyl alcohol. Set the mug aside and gather your multi-purpose acrylic paints and other supplies.
Next cover your workspace with the newspaper.
Once your space is ready, add the paint to whatever you decide to use as your palette (I often use old butter bowl lids).
Try to avoid touching the area where you intend to add your artwork. You do not want the oils from your skin contaminating your prepped surface. Then using a liner-brush, draw an outline of your art design. Set aside and allow to dry. Then oven cure as directed. Let cool.
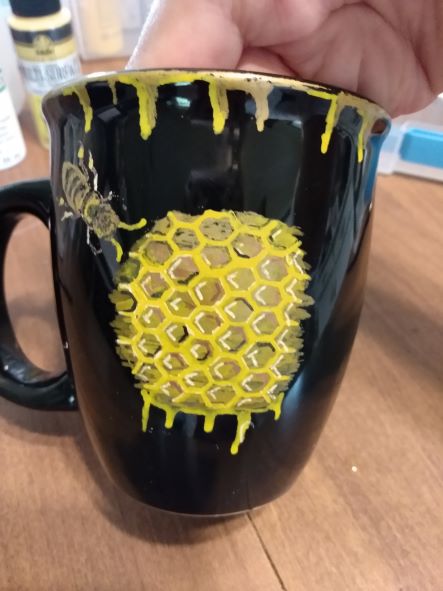
After your outline is cool, start adding in the background, or base, colors. Again you will need to let this layer dry before going back to add details. The paint will come off easily at this point. Work carefully when adding details. Find a spot underneath your mug to add a few test dots. You will use these to check after oven curing to see if the paint has set.
Curing the Mug
Once you have created your masterpiece. Follow the directions listed on your all-purpose paint. Most will say to allow the paint to air-cure for at least an hour before oven curing. Some brands of paint will say that air curing for a longer period of time will be sufficient (without curing in an oven). The paint that I am using says to let the mug air dry for one hour. Then place in the cool oven, and turn the heat setting to 350 degrees for 30 minutes. I do not start my timer until the temperature is at the desired heat.
After the timer goes off, turn off the oven and allow it to cool before removing it. Let cool completely for 24 hours. Then, do a scratch test on one of your test dots to see if the paint has cured. If not, repeat the heating process.
I prefer the the type that cures under heat, but I still leave them to air cure for at least 14 days before washing or using.
Even though most paint will say dishwasher safe, I recommend hand washing without soaking any handprinted items.
Paint Pens and Issues, Oh My!
I had purchased paint pens that said that they were dishwasher safe after curing. I used them as directed. Sadly, the areas painted with the paint pens did not adhere to the glass. I had to remove it and repaint the wings on the bee and wording with FolkArt multi-surface paint. If anyone has found a brand of paint pen that works on glass please let me know.
Make sure to inspect your work carefully for mistakes before curing! Once the paint has set, it becomes permanent. I accidentally got a dot of paint on the handle before the first round of oven-curing. I had to get creative and add yellow polka-dots along the handle to cover my blooper.
Jazz It Up
If you want to create a personalized mug for a end of year gift for a teacher, or for Father’s day, you can make it extra special by making the mug into a miniature gift basket.
Line the mug with a small plastic party favor bag. Add a gift card, pens, candy, fishing lure, or whatever tiny items will work with your theme. Tie closed with a ribbon and add a card. You are all set.
My Finished Mug

Branch Out to Add Pieces
Using multi-surface paint on other glass items: If using plates and glass cutting boards, use a type of paint that will air-cure and become dishwasher safe. FolkArt Multi-Surface Paint is one that I use for those items. Do not place items made of thin glass in the oven as they may burst.
Use clear glass plates and cutting boards, and add the design to the underside of these items. If you are painting the underside of a plate or cutting board you add your layers in reverse order. This takes a bit more skill and planning. With practice, the results can be stunning.

The flowers are from my flower garden.
Resources:
No businesses, or brands, mentioned in this post are affiliates.
Jerry’s Artarama is my go-to online store for brushes. You can’t beat their brushes or their sales!
Happy Painting
Have fun painting your mugs. I would love to see your finished projects. If you have tips that you would like to share, let us know.
If you enjoyed this post, please subscribe and share.
Stop back by any time,
Vikki Bee