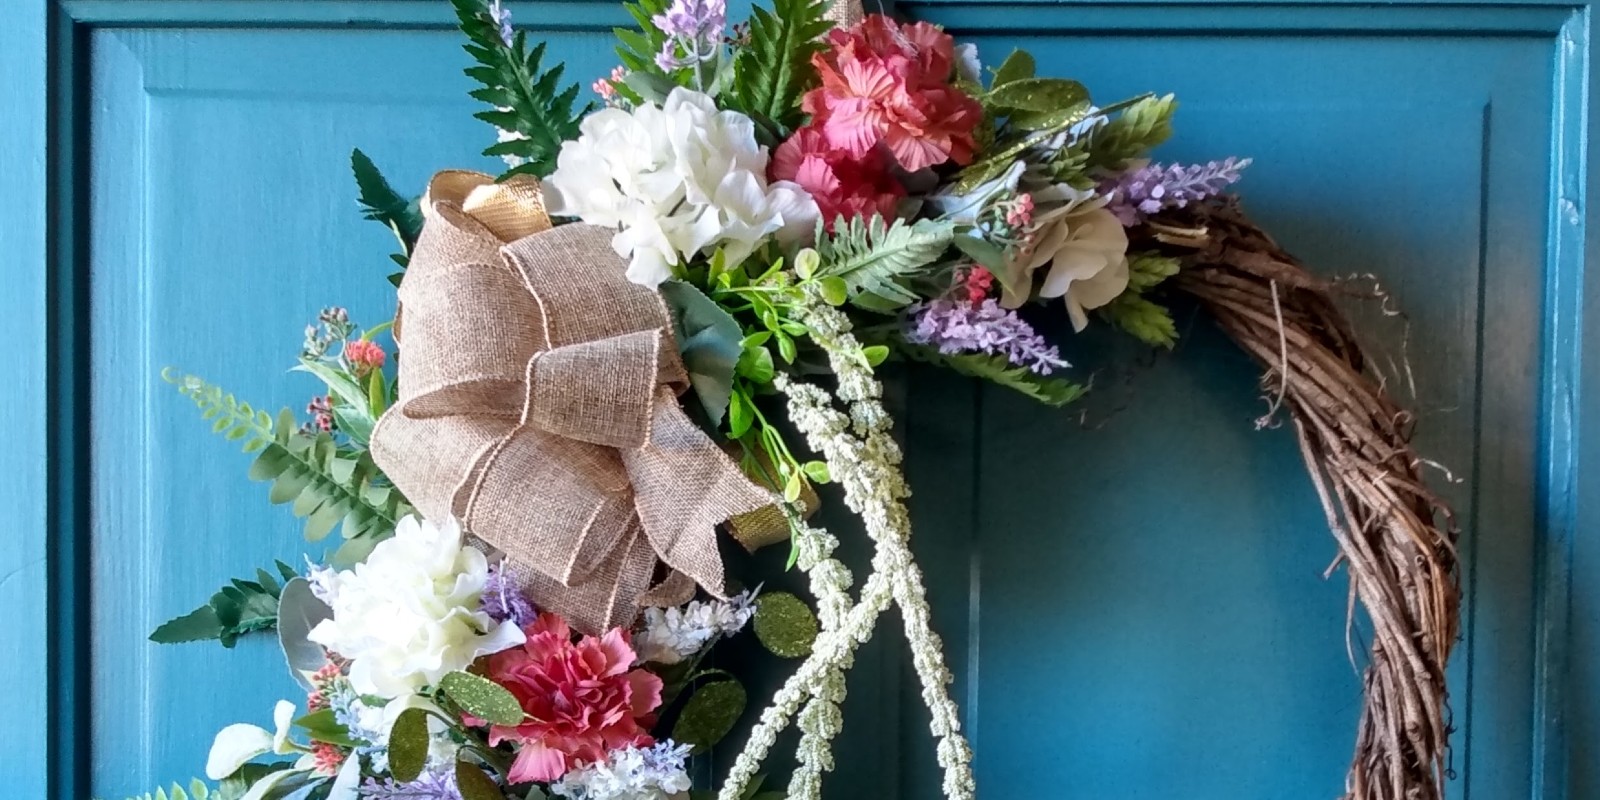
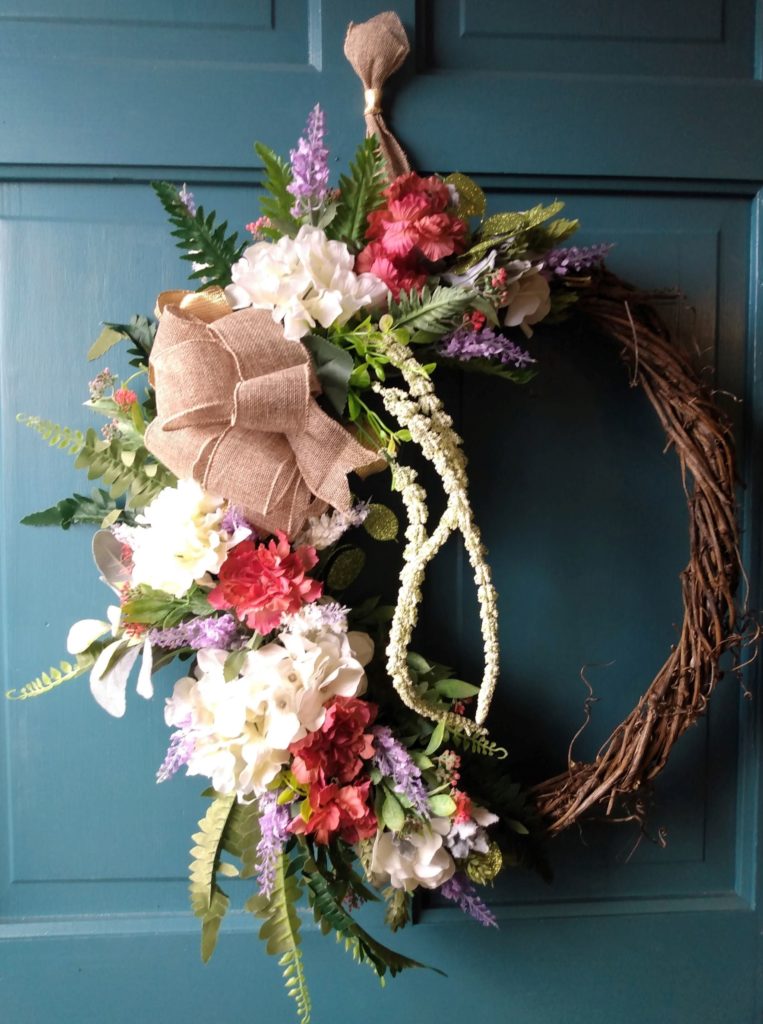
Spring Floral Grapevine Wreath
Creating décor for your home that looks high-end can seem intimidating. With a bit of practice, you can create beautiful wreaths that are true works of art. You will be able to create a wonderful wreath just in time to give for Mother’s Day, or to keep for yourself.
My first flower arrangements were made of wildflowers that I would find along our gravel road. I noticed that many of those same flowers would dry on the stems. Using these, I started making wreaths to give as gifts. When people started asking for my designs, I started creating flower arrangements and wreaths to sell at local festivals. I am not sure if my designs were that attractive, or if people were amazed that a child had their own booth!
Each year I would sell my designs, saving part of my earnings for floral supplies, using the rest to buy school clothes. My oldest sister saw my interest in flowers and gifted me with a book on creating floral arrangements. That one book cemented my fascination with floral design. I hope to do the same thing, and inspire others to create, especially younger people that visit my site.
Supplies That You Will Need:
- Floral wire
- Needle Nose Pliers (with wire snip)
- Hot glue gun and glue sticks
- Wired Ribbon for bow, or purchased bow
- Grapevine wreath
Safety
- Have a trashcan near your workspace to discard flower stems that have been snipped off and floral wire scraps. Both can be embedded into a foot very easily if stepped on, and could also pose a danger to children or pets.
- Keep hot glue guns out of reach of children when in use.
- Finger guards are recommended when using a glue gun.
Preparing Your Supplies
If you have made your own grapevine wreath you will want to decide which side of your wreath you want to face outwards. Flip your wreath over and carefully snip away any vine tendrils that are pointing backward. This will ensure that your finished product will lay firmly against the wall or door.
If you are tying your bow, you may want to do that before starting on your wreath so that you can lay it in place on the wreath to decide where your bow will be placed on your wreath and how much of an opening to leave open.
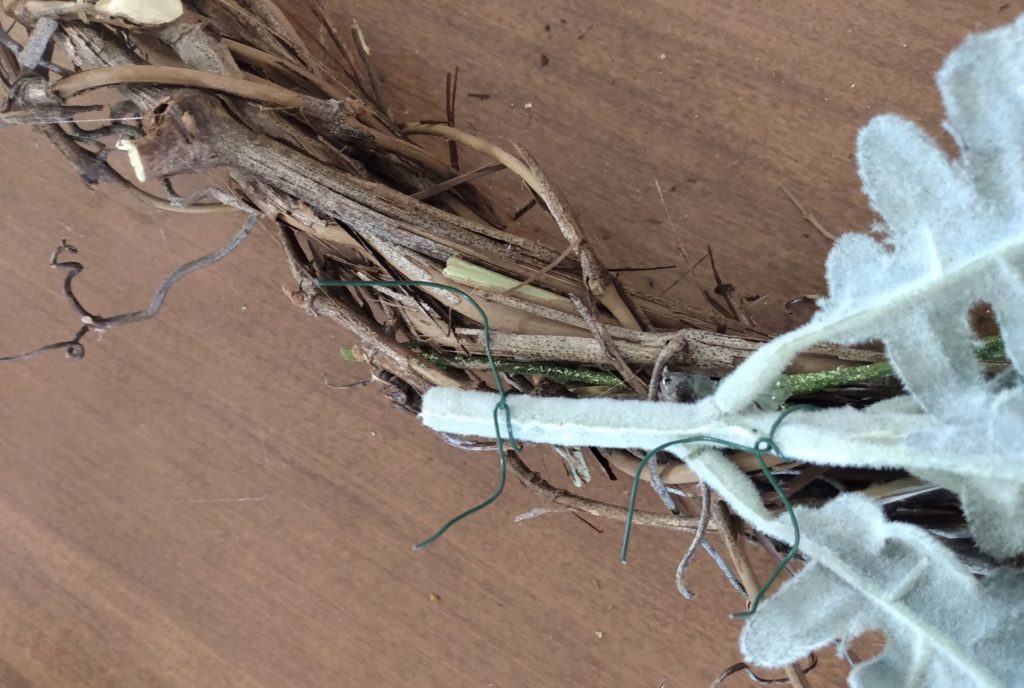
Separate the flower picks into individual stems before adding them to the wreath. This allows for greater ease while wiring the stems in place, as well as giving your creation a more balanced look.
Cut at least 15 individual pieces of floral wire (about three inches long) and place them in a small bowl near the workspace. You may need to cut more wire as you go.

Getting Started
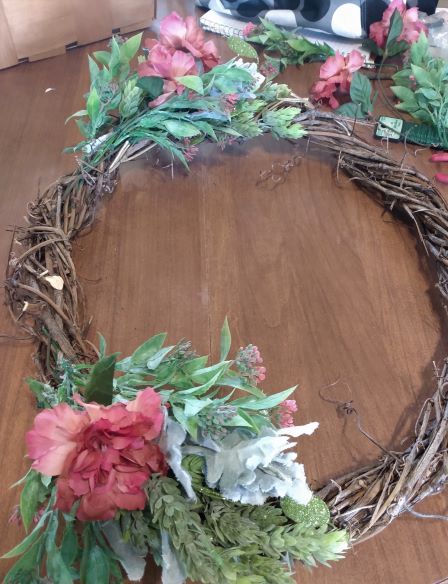
Decide what you want your wreath to look like. Start work placing your greenery along both sides of where your bow will go. Wire in each stem as you go, moving from one side of your wreath to the other (to keep your floral additions symmetrical). After the stem is wired in place, I also add hot glue to secure it in place. Using your pliers, curl the wire to where no sharp edges are exposed, and tuck them down into the wreath. For my greenery base, I used lambs’ ear, hops, ferns, and eucalyptus (I did keep a few small sprigs of the eucalyptus to add to the wreath after the florals were finished). Feel free to choose greenery of your liking.
You are now ready to start adding your
largest flowers.
Spacing out the larger flowers, add your stems, moving from side to side to achieve symmetry (refer to the photo of the finished wreath). Generally, I use groupings of three, or five, on each side. This seems to be more pleasing to the eye. Remember to wire the stems in place as you go, then secure with hot glue. Generally, I leave part of the grapevine wreath bare. You can decide how much, or how little, of your wreath, that you leave exposed.
Wire your bow in place. Next, add the smaller flowers to your wreath to fill in any areas that you feel need a bit more filler, wire in if possible, securing with hot glue. Decide if you need a bit more tweaking, or if it is finished to your liking.
Resources
Wreath making can be a fun hobby or side income. If you plan to sell wreaths at craft shows you may want to consider buying inventory at the end of each season to get better prices. I have ordered florals online, but I like to buy them in person. The quality of your florals and ribbon will determine the overall aesthetic of your finished product. I do buy some florals from Dollar Tree, but I carefully inspect them to make sure the heads are compact without any plastic showing in the center, and that the edges are not frayed. Mainly I buy flowers there that I use for filler. Below I am listing retailers that I use when purchasing florals, and ribbons.
None of the sites are affiliates, they are simply some of my favorites.
Dollar Tree: Some florals for filler, seasonal wired ribbon, floral wire
Michaels: florals, wired ribbon
Joann’s: grapevine wreaths, wired ribbon, florals, floral wire, floral tools
Hobby Lobby: Florals, wired ribbon
If you decide to make your own floral wreath, send me a photo. I’d love to see your work.
Thanks for stopping by,
Vikki


One Comment